The main reasons for the breakage of stretch marks, as well as a step-by-step procedure for removing it and replacing it with a new one.

The braces on the car are designed to hold two opposing struts together.
The main function of this type of device is to reduce the flexibility of these struts when the machine turns sharply. Stretch bars increase the strength of the body, allow the most comfortable cornering and improve the feedback between the car and the driver.
The main reason for the breakdown of car stretch marks is that they were illiterate (or poorly) made or installed. They must be at the same time lightweight and as strong as possible - which is why most high-quality products of this kind are made of aluminum or carbon (carbon fiber), but steel braces are also widely used today.
Step-by-step procedure for replacing a stretch
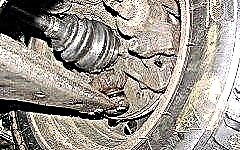
1. First of all, place the machine on secure supports and then remove the corresponding front wheel of the vehicle.
2. Then you need to clean the nut of the front fastening of the brace from dirt.
3. In order to make it easier to unscrew the nut fastening to the brace bracket, experts advise to apply a liquid of a type such as WD-40 to the threaded connections and wait a short period of time.

4. After that, it is required, while holding the extension with a wrench, to loosen the nut tightening.
5. Then it is necessary to remove the front suspension arm.
6. The next step is to completely unscrew the nut of the front fastening of the brace, and then remove the special outer washer.

7. After that, it is required to remove the stretch - in this case, its front end must be removed from the hinge (rubber-metal).
8. Then you should remove the special inner washer from the stretch, as well as the package of adjusting washers, be sure to count their exact number (in the event that they, of course, are installed).

9. In order to replace the rubber-metal hinges of the stretcher, you need not only skill, but also a special tool. Car service specialists and experienced craftsmen of modern service stations recommend two main options: either change the assembled beam with hinges, or remove the beam from the car and replace the hinges in a specialized workshop.
10. In order to remove the beam, it is required to unscrew 3 bolts of its fastening on both sides.

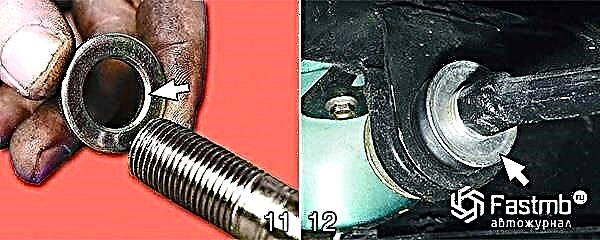
11. After that, you need to install a new lever, moreover, in the order that is the reverse of its removal. Moreover, the adjusting washers must be installed in the same quantity and on the same sides of the lever. On their inner diameters, the chamfers must be directed towards the thrust shoulder of the stretch.
12.It should be noted that the outer flange of the rear washer located on the bracket must be directed away from the hinge. At the end, on a car that is on the ground, it is necessary to finally tighten the threaded connections of the suspension.