The content of the article:
- What is noise insulation for?
- Varieties
- Choosing a material
- What kind of sound insulation is better
- Self-installation
- Places of increased attention
Buying a car is always an event, and a joyful event. But this joy can be overshadowed by some nuances that the car owner may have had no idea about before buying a car.
For example, cars can have more or less vibration, which is not good for health. And what about extraneous noises during the journey? Agree that, once in a cozy car, you want complete comfort, including silence, to listen to your favorite music or just relax.
What is needed for this? Any self-respecting driver in a car should have high-quality sound insulation.
What is noise insulation for?

Unfortunately, manufacturers do not set such pleasure on all brands of cars, but only on those that belong to business class cars. On inexpensive models, you will either not find noise isolation at all, or it will be of very poor quality.
Extraneous noises not only will not give you the opportunity to listen to music and talk calmly, but will also reduce attention and response speed, leading to quick fatigue.
The result will be irritation, which will lead to a tougher driving style. A hard driving style is one of the reasons for serious troubles that can arise on the highway.
Installation of noise insulation in the car is needed to perform the following tasks:
- for soundproofing the engine compartment;
- to dampen the noise that comes from the gearbox;
- to reduce road noise;
- to eliminate squeaks and other extraneous noise that can be reproduced by plastic parts of the interior trim;
- for interior thermal insulation.
Unfortunately, the process of installing noise insulation on a car with your own hands is a forced necessity, because manufacturers, in order to save money, pay almost no attention to this problem. This was especially evident after the suspension, as a result of the improvement, became much quieter - sound insulation seemed to have lost its relevance.
And, we must pay tribute to the results of the work of the designers, at the beginning of the operation of a new car, noises and squeaks may indeed be absent. But later, especially if you drive on bad roads, these noises will certainly appear.
They penetrate into the interior, as a rule, through the floor, ceiling, doors and trunk. These noises meet all sorts of obstacles on their way and from this weaken to some extent, and also transform into vibration, which is also perceived by the driver as noise. Therefore, the noise in the cabin can be divided into primary and secondary.
High-quality sound insulation successfully copes with these types of noise. To achieve the desired result, an integrated approach is required, involving the treatment of the entire machine with insulating agents.
In general, there are no trifles in a car - absolutely everything is important, including sound insulation. Therefore, if the manufacturer has not installed sound insulation on your car, you need to take care of it yourself. You can install it with your own hands, which will be discussed below.
Varieties of noise insulation

If you decide to install sound insulation on a car, you should first figure out where to place the sound insulation materials. It turns out that each sector of the car has a separate material. Consider the main types of noise insulation:
- on the door;
- on the arches;
- on the floor in the salon;
- on the ceiling;
- on the trunk;
- elimination of squeaks in the cabin.
Based on the main goal that you set, sound insulation can be installed in full or partial. In addition, you can pick up materials of this kind that, in addition to damping noise, will give the effects of vibration and thermal insulation. This addition will increase comfort on long journeys.
Choosing a material for noise insulation

To choose a suitable material for noise insulation, it is necessary to understand these materials and know the varieties that have demonstrated their reliability and efficiency to motorists, since they were developed specifically for these purposes:
- Visomat. Made of resin with foil as top layer. It is advisable to use this material for large surfaces such as: arches, floor, roof, trunk. This coating is very effective against sound vibrations and also reduces vibration. To glue the visomat, you first need to clean and degrease the surface to be treated, and then warm up the resin with a construction hair dryer.
- Vibroplast. Foil-based universal coating. A hairdryer is not required for installation, but if you use it, it won't get any worse. Most often, vibroplast is used for doors, roof and trunk.
- Spleen. A porous coating with excellent sound insulation parameters. There is one drawback: interacting with plastic surfaces, it can make a squeak.
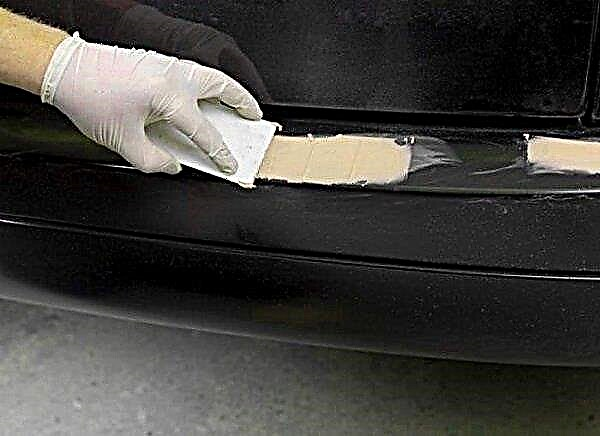
- Bitoplast. It is used to eliminate squeaks, as well as to fill gaps between different parts and sectors in the cabin. The material is somewhat reminiscent of foam rubber. Getting into the slots and gaps, it immediately takes their shape, reliably isolating the contacting surfaces. It is widely used in all areas of squeak in the interior of the car, as well as on parts made of plastic.
- Madeleine. Special fabric covered with an adhesive layer. It is used to fill gaps between elements of different structures and for winding electrical wires.
What kind of sound insulation is better

Of course, the final choice of soundproofing is always up to the driver. He decides this issue himself, based on the situation, tasks and personal financial capabilities. It is known that a professionally installed "Shumka" will solve this problem more efficiently, but, nevertheless, sound insulation can be installed with your own hands. The main thing is strict adherence to technology, as well as the desire and availability of free time.
Due to the fact that when installing sound insulation, the vehicle will have to be partially dismantled, you must first study the instructions for it so that there are no difficulties during dismantling.
Which sound insulation is the best is difficult to say, or rather impossible. If you use special materials made only for the car for this purpose, then you cannot go wrong. These materials take into account all the nuances of future operation, such as temperature changes, humidity, vibration.
At the same time, we do not advise looking for only thermal insulation separately, or only vibration isolation, or noise isolation. Keep in mind that modern technology allows you to combine all these qualities in one material.
Although, perhaps, we advise you to pay attention to the heat resistance of the insulation material that you will use for the motor sector.
The price of sound insulation depends on the thickness of the material, as well as on its technical characteristics. And if you did not spare the money for such a necessary addition for your car, it will pay off with a comfortable silence in the cabin, as well as the absence of vibration and squeak.
In addition, due to the insulation in the winter, the cabin will be much warmer. And in the summer, it will warm up more slowly from the sun's rays.However, if you want to make the salon perfectly insulated, you will have to apply several types of insulation, among which the foil layer must be present.
We make noise insulation on our own

Self-installation of sound insulation consists of the following steps:
- complete disassembly of the passenger compartment;
- gluing the required surfaces with insulating materials;
- installation of materials to eliminate squeaks in the cabin;
- interior assembly and analysis of the quality of the work performed while driving.
Before installing the noise insulation, the interior of the car must be disassembled, leaving only the metal surfaces. It is up to the driver to decide whether or not to remove the front panel. If you remove it, the quality of the work will increase, but not much, so everything here will depend on your desire and free time.
When dismantling the passenger compartment, be careful with fasteners that can be easily lost or damaged. As a result of disassembly, the interior should be completely "naked". After that, clean from dirt and degrease all metal surfaces and only then start gluing with noise-insulating material.
Install vibration isolation material first. They need to glue about 80% of the entire area of the processed metal surfaces. Glue sound insulation on top of this material. However, this rule may not be observed if both of these properties are combined in the material you purchased. You should not save on defective or thin material, otherwise the desired result will not be achieved, and all efforts will be in vain.
Attention: when working with foil insulation, use protective gloves, otherwise there may be cuts.
Correctly installed sound insulation will save you from unnecessary sounds from the outside, but will not solve the problem associated with squeaks in the cabin. Therefore, as soon as you finish installing the soundproofing, immediately start eliminating internal squeaks.
For this purpose, use the materials that we have already talked about. Place these materials between the metal surface and the plastic parts of the passenger compartment.
Assemble the passenger compartment in the reverse order.
Places of increased attention

When carrying out work on the installation of sound insulation, it is necessary to pay special attention to individual zones:
- Doors. Soundproofing the doors of the car must be performed without fail, because most of the noise penetrates through them. This is due to the large area of the doors on one side and, on the other hand, to the small number of stiffening struts inside each door. High-quality door processing has a huge effect in the form of a noticeable increase in acoustic comfort in the cabin.
- Hood. If you do not treat this area with soundproofing material, then the desired result will also not be, especially for cars with a diesel engine. Like the doors, the bonnet has a large area, which is conducive to high vibration loads.
- Trunk. Noise from the rear arches passes through it, so the soundproofing of the trunk is a must.
- Roof. When driving at high speed, the roof provokes a lot of noise and vibration. By insulating the roof, you will get rid of the unpleasant hum in the cabin.
- Floor. This area also cannot be bypassed, because it has direct contact with the wheel arches and parts of the suspension, from which noise and vibration emanate. For best results, try to use the thickest possible insulation layer for the floor.
- Wheel arches. These parts themselves are not sources of noise and vibration, but they transmit very well both noise and vibration from other mechanisms to the interior. Therefore, soundproofing of the arches is necessary.
In conclusion, we would like to once again draw your attention to the fact that the sound insulation of the entire car is a complex and multi-level work that requires a lot of time. This circumstance must be taken into account before starting the installation of noise insulation materials.